Slump Testing of Concrete
The concrete slump test is done to check the workability of concrete. Following are the slump test theory, limitations, use, procedure, test apparatus, and precautions.
Statement of Problem
i) For M150, 220 litres of total aggregates is required to be used per bag of cement. Slump desired is 50 – 100 mm
Assume fine aggregate to the coarse aggregate ratio as 1:2 using zone II sand.
Keeping FA/CA ratio same, calculate slump when w/c ratio is 0.6, 0.68, 0.75 and state how the slump change with an increase in water.
ii) Keeping W/C ratio at 0.68, FA: CA = 1:2, observe slumps, when the total aggregate is progressively reduced from 220 litres per bag to 200 litres per bag and 180 litres per bag. State how to slump, cohesiveness, and harshness changes with the change in C/A ratio.
iii) Keeping W/C ratio at 0.68, (CA as 50 kg/220 litres) observe slump, cohesiveness and harshness, when FA: CA ratio changes from 1:1, 1:2, 1:3.
State how to slump cohesiveness, and harshness changes with the change in FA: CA ratio.
Note: FA = Fine Aggregates, and CA = Coarse Aaggregates.
Theory
Concrete slump test, which gives a measure of the workability of the mix in terms of a slump. The slump is observed after the subsidence of a concrete mix. The theory of the slump test is described below.
One can get a fairly good idea of cohesiveness by gently tapping the platform on which cone stands. A good cohesive mix subsides further without the coarse aggregate tending to fall out of the mix during tapping.
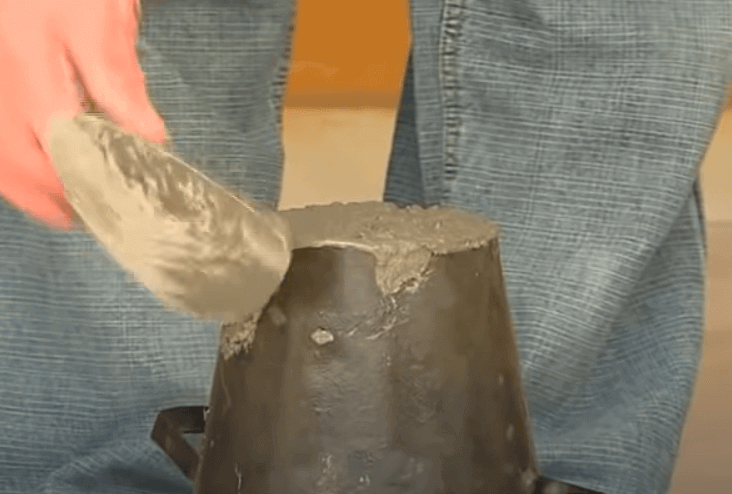
Harshness can be detected by troweling the mix to obtain a smooth surface. Harsh concrete is usually under sanded and does not give a smooth finish to the surface even with troweling under pressure.
The adequately sanded mix gives a smooth finish with normal troweling. Over sanded mix gives a smooth finish with even light troweling.
Procedure
The procedure of Slump test is described below
Test Apparatus
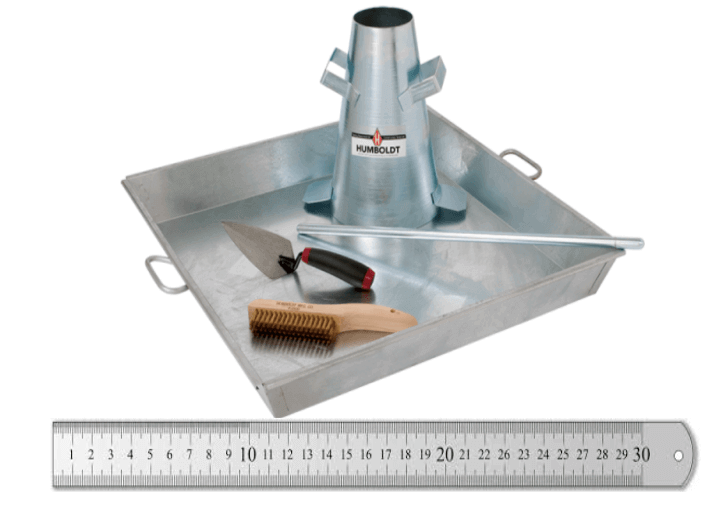
Following are the test apparatus used for slump test:
- Mould in the form of a frustum of a cone.
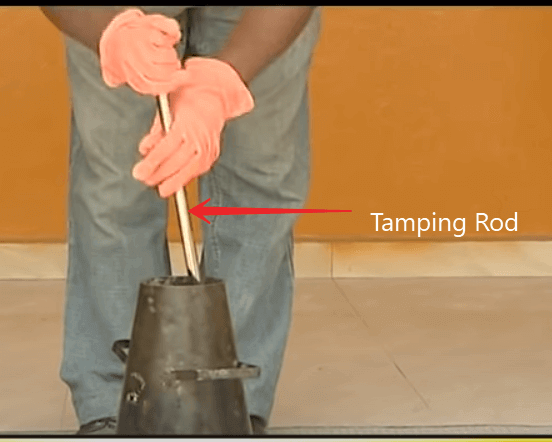
- Tamping rod, 16 mm dia and 0.6 meters long, rounded at one end.
- Trough.
- Trowel.
- G. I. Plain sheets.
- Steel Scale.
Image of all apparatus used in concrete slump con test
Following are the steps followed during slump test
A) How To Conduct A Slump Test??
a) The internal surface of the mould is thoroughly cleaned and free from superfluous moisture and set concrete, if any, before starting the test.
b) The mould is placed on a smooth, horizontal, rigid and non-absorbent surface such as a fully levelled metal plate.
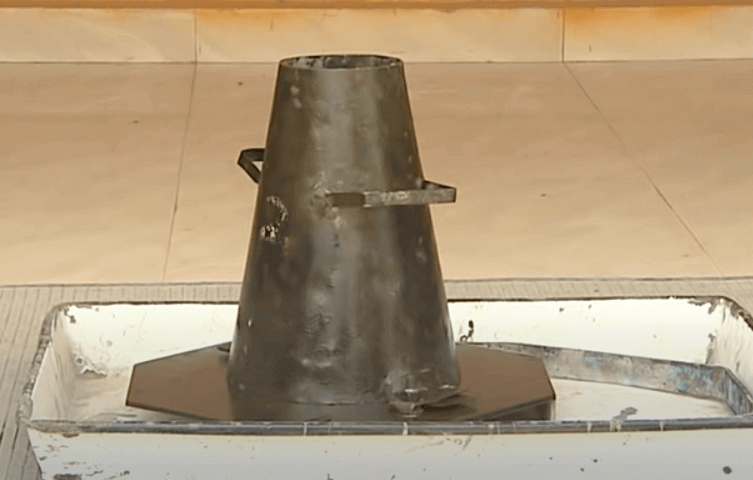
c) The mould is held firmly in place before the concrete is filled in.
d) Concrete under test is filled in the mould in four layers and each layer is approximately a quarter of the height of the mould. Each layer is tamped with 25 strokes of the round end of the tamping bar. The stroke should be distributed over the entire area of the mould.
e) After the top layer has been filled, the concrete should be struck off level with a trowel or the tamping road so that the mould is exactly filled. All mortar which has leaked between the mould and the base plate is cleaned away.
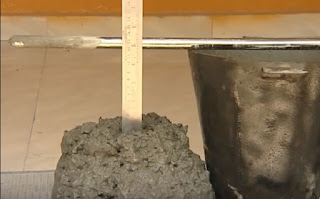
f) The mould is immediately raised from the concrete slowly and carefully in a vertical direction. This allows the concrete to subside and the slump is measured immediately by determining the difference between the height of the mould and that of the highest point of the specimen being tested in mm.
Video of Concrete Slump Cone Test
B) To Verify The Effects Of FA/CA Ratio, Total Aggregate/Cement Ratio, Observe the Effects Of w/c Ratio On Slump
a)
⇒ Take a suitable proportion, say 1: 2: 4 by volume or by weight.
⇒ Calculate ingredients for a 3 kg batch of cement.
⇒ Make three trials by adding different quantities of water and measure slump and obtain workability, harshness, and cohesiveness.
⇒ It will be found that more the amount of water used, greater is the slump. Conversely, in the field, a sudden increase in slump indicates the increase in water contents if other factors remain constant and water has to be changed accordingly.
b)
Given constant w/c ratio and constant total aggregate-cement ratio, observe the effect of F.A/C.A ratio on the slump.
⇒ Assume (suitable) proportions.
⇒ determine the ingredients for 3 kg batch of cement.
⇒ Make three trials by keeping w/c and total aggregate/cement ratio same, but by varying F.A/C.A ratio and observe slump and workability, harshness and cohesiveness.
⇒ It will be observed that deficiency in F.A tends to segregate the concrete and more percentage of F.A requires more water for obtaining the desired slump.
⇒ In the field, if the slump test indicates segregating tendency, it means that the aggregate is deficient in fines. Or if the water is required for the desired slump, it means there is an excess of fine aggregate.
c)
Given the constant W/C ratio and F.A./C.A. ratio, observe the effect of the A/C ratio on the slump.
⇒ Select a suitable proportion by volume or by weight.
⇒ Calculate ingredients for a 3 kg batch of cement.
⇒ Keeping W/C constant and F.A./C.A. ratio constant, make three trials by varying the total quantity of aggregate.
⇒ Measure slump in each case and observe workability.
⇒ It will be observed that smaller the A/C ratio, greater is the slump. In the field, if the slump test starts indicating greater slump, check on batching has to be done to verify that proper quantities are added as per design.
Precautions
a) The test shall be carried out at a place free from vibrations or shocks and within a period of two minutes after mixing if it is a field test. For laboratory test, reliable results corresponding to site conditions can be had if the slump test is carried out 10 minutes after mixing.
b) If slump collapses or shears off laterally, the test may be repeated, and if again same results are obtained, the fact should be recorded and slump measured.
c) For a laboratory test, it is better to convert all quantities into weight by multiplying the volume by bulk densities. In the absence of exact data, assume bulk densities from 1.5 to 1.6 for F. A. and 1.6 for C. A.
Limitation
The limitations of the slump test are as follows:
Because of its simplicity in performing the experiment and its sensitivity to changes in the moisture content of the successive intended identical mixes, it is widely used in the field for judging the workability.
This test has limitations. Slump observed strictly, speaking has no relation to useful internal work required for full compaction.
Also, a significant variation can be obtained with the same concrete.
Three types of slumps are obtained:
a) True slump
b) Shear slump
c) Collapse slump

Collapse slump is usually obtained with lean harsh or very wet mixes. It is difficult to measure a slump when the shear slump is obtained.
Generally, concrete giving shear or collapse slump is considered unsatisfactory for placing. The above Fig shows the different types of slumps obtained. Rich mixes normally behave better than lean dry and very wet mixes.
Choice Of Slump
The slump observed during the test is required to be compared to -some standard value of slumps considered desirable for various types of placing and vibrating conditions.
The basically higher slump is chosen when vibration is done manually, sections are small are heavily reinforced. Also greater the nominal size of aggregate, more slump is preferred.
Based on the experience and experiments, various authorities such as Concrete Association of India, P.C.A. Illinois, have suggested values of slumps and are reproduced in part I. Out of all the data given, the one given by McIntosh is more comprehensive.
The table gives the range of slumps to be aimed at. As a rule, lower limits of the ranges are preferable. But in case of difficult placing conditions, it is better to aim at the higher limit of the range.
Use Of Slump Test
The slump test of concrete is very useful on-site to keep the check on a day-to-day, hour-to-hour variations in the materials fed into the mixes.
An increase in slump may indicate an unexpected increase in the moisture content of aggregate. Or it may indicate a change in gradient of aggregate, e.g. deficiency of sand, or change in the shape of the aggregate.
Too-high or too-low slump gives immediate warning to the operator and enables him to remedy the situation.
For dry mixes with very low Water/Cement ratios, the slump test gives zero slumps and is not useful for high strength concrete. This test should not be used to compare workability of mixes of different proportions or types of aggregate as the results might be misleading.
Recommended Value of Slump For Various Construction Works
Following are the recommended value of slump for different types of construction works:
| Sl. No | Types of Construction Works | Value of Slump |
| 1. | Heavy mass construction | 25mm to 50mm |
| 2. | Pavements works | 25mm to 50mm |
| 3. | Un-reinforced footing, caissons, and sub-structure walls | 25mm to 75mm |
| 4. | For bridge deck | 25mm to 75mm |
| 5. | Reinforced foundation walls and footing | 50mm to 100mm |
| 6. | Ordinary R.C.C slabs, beams, walls | 30mm to125mm |
| 7. | For building columns | 75mm to 125mm |
| 8. | For Concrete work underwater | 150mm to 180mm |
Read Also: